# Smart Home Security Alarm System: A Practical Guide to Getting It Right
# Smart Home Security Alarm System: A Practical Guide to Getting It Right
You’re here, not because you want more beeping gadgets in your home, but instead, you want your house to become smarter and safer.
You might have experienced a close break‑in, a package theft, or just that indescribable feeling “did I lock the door?” driving to the airport. You have been interested in smart home security alarm systems and found out about the chaotic jungle of hubs, protocols, subscriptions, and opinions.
The discussion is messy because every producer proposes all services, but the truth is: there are systems that fit apartments well, some large houses, some for technical users, and some that are easy for people who want just “arm and disarm” option.
At Security System, we have encountered many homeowners in the U.S. and Europe from “I can rewire a panel in my sleep” to “I am not sure what Wi-Fi I have.” The common ground among them: they all want the system to be reliable when needed and to be invisible when not needed.
This article will introduce you to a distinctive, hands-on method of dealing with smart home security alarm systems so you will be competent enough to choose one that you can set up-something that fits your house, your lifestyle, and your level of risk.
To make the abstract real, we will go through a simple blueprint you could repeat:
– Recognition of the four basic elements in a smart alarm system.
– A security blueprint designed using your real risks.
– Concentrate on the features that really enhance security.
– Follow a step-by-step setup schedule.
– Escape the most common errors that зunattenuated good systems.
Let’s replace “I wish this works” with a system you can trust.
—
## 1. What a Smart Home Security Alarm System Actually Is
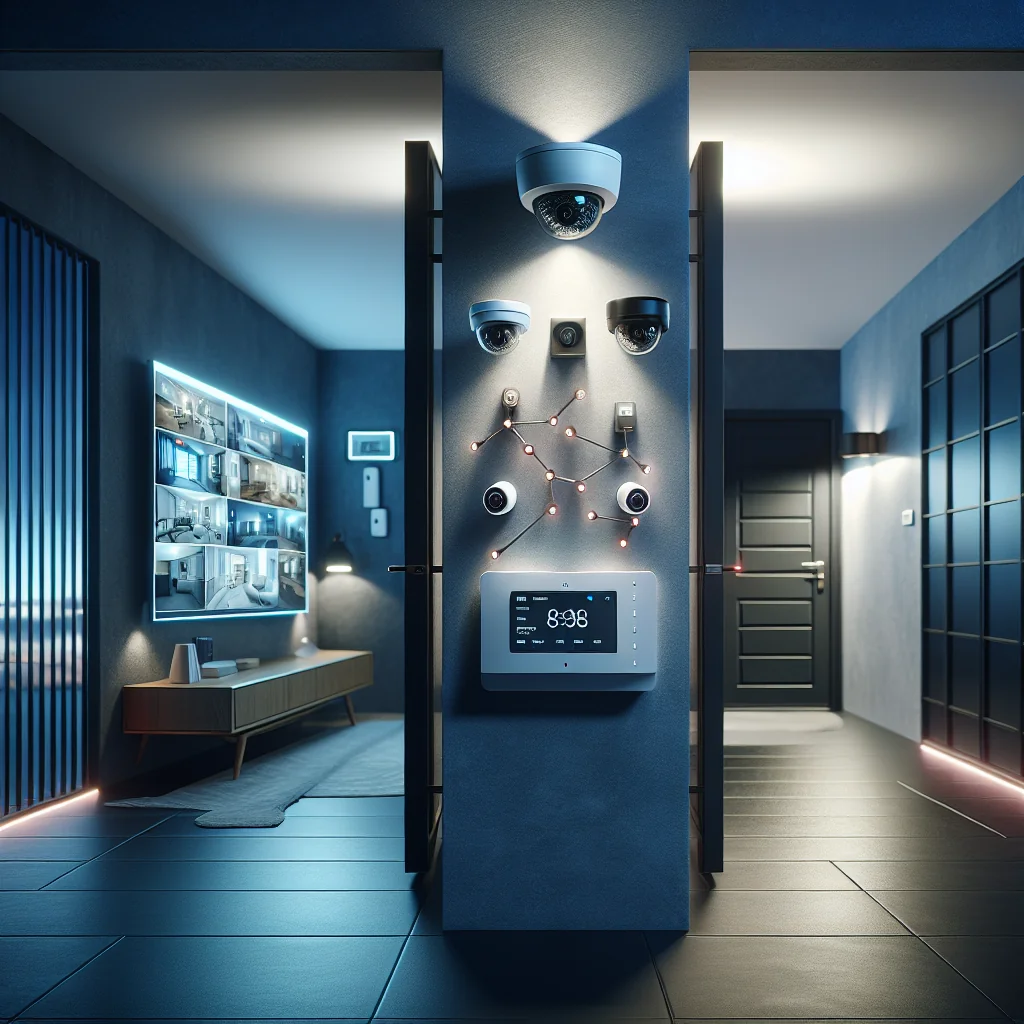
A **smart home security alarm system** is a set of interconnected devices that spot dangers (mostly from unauthorized access, though at times through fire and leaks), trigger or alert you, and give you access to monitor and control everything from an app or hub remotely.
Normally, you are dealing with four blocks of construction to form the skeleton of the blueprint.
### The four core components
Before we get further, it is good to observe the primary components side by side so you can superimpose them on your practical needs at home.
| Component | What it does | Why it matters | Common mistake |
|---|---|---|---|
| Control unit (hub) | Connects sensors, sirens, and the internet | Acts as the “brain” of the system | Hidden in metal cabinets or poor signal areas |
| Sensors | Detect doors opening, motion, glass break, smoke, leaks | Provide the “eyes and ears” of the system | Bad placement leading to blind spots or false alarms |
| Alarms & notifications | Sirens, push alerts, calls, or monitoring center signals | Turn events into action and response | Silent alarms nobody sees in time |
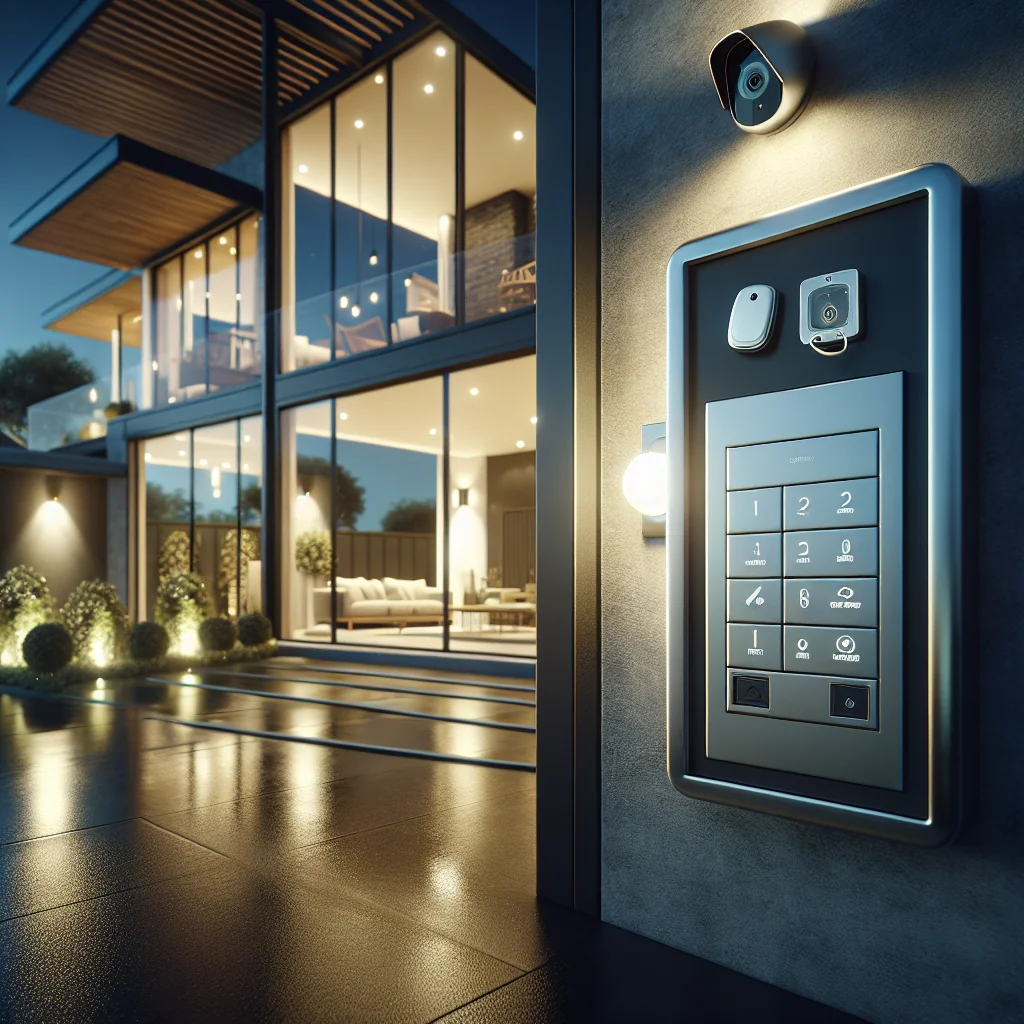
| Connectivity & control | Apps, keypads, key fobs, voice, cellular backup | Lets you arm, disarm, and check status anywhere | Relying only on Wi‑Fi with no backup |
In straightforward terms, you can interpret it like this:
- The hub is your central nervous system.
- Sensors are the nerves feeding information.
- Sirens and alerts are the reflexes.
- Connectivity and controls are how you consciously interact with it.
A common idea is that many devices necessarily mean better security. In the actual sense, a small, very well-designed system that all in the household understand is much more effective than a complicated setup.
### How this fits into your overall blueprint
Your system blueprint, at its vision, should always have four questions:
- Where is the hub, and does it stay online?
- Which sensors protect which entry points and rooms?
- What actually happens (sirens, alerts, calls) when something triggers?
- How do you and your household arm, disarm, and check status?
If you can scribble down those four points on a piece of paper, then you already have a base to a clear, actionable design.
—
## 2. Designing Your System: Start With Risk, Not Gadgets
Before making any purchases, develop a blueprint. Picture it as a **security blueprint** for your home, not a mere shopping list.
This blueprint phase involves turning “I want to feel safer” into clearly defined priority coverage.
### Step 1: Map your home and entry points
Start with an easy floor plan. It can be hand-drawn by you or drafted in a simple drawing tool. No need for aesthetics, just keep it real.
- Mark all doors: front, back, balcony, garage, basement.
- Mark windows at ground level or easily accessible (balcony, flat roofs, fire escape).
- Note the spots that are weak:dark side passages, hidden garden gates, basement entrances.
- Every main external door should have at least one contact sensor.
- You can add a motion sensor to cover the main path from those doors into the house.
- You can protect high-Risk windows with contacts or a glass break sensor that covers a group of panes.
- What is your greatest fear on this issue? Burglary, vandalism, package theft, or personal safety at night?
- Indoor only or both indoor plus outdoor?
- Do you prefer more deterrence available (visible sirens, cameras) or quiet detection (alerts to your phone)?
- Pros: Highly flexible, cost-effective long-term, and easy to move or adapt when you relocate.
- Cons: Design, setup, and troubleshooting are your responsibility.
- Best for: Tech‑comfortable users, renters, smaller homes.
- Pros: App control plus someone to call you or dispatch responders if you miss an alert.
- Cons: Monthly fees; in some regions, contracts and cancellation terms.
- Best for: Primary residences, frequent travelers, higher‑risk areas.
- Pros: Expert planning, neat installation, support when things break.
- Cons: Higher upfront and ongoing costs; less flexibility to change hardware.
- Best for: Larger homes, complex layouts, or people who simply do not want to deal with it.
- Backup battery: Keeps the hub alive during power cuts.
- Cellular backup: Lets alerts go out even if broadband or Wi‑Fi fails.
- Set both entry and exit delay to about 30 seconds.
- Use the system for a week in normal life.
- Adjust in 5–10 second increments if you find yourself rushing or waiting.
- Home/Stay mode: Perimeter (entrances/windows) armed, internal motion off.
- Away mode: Everything armed.
- Night mode: Usually custom; for instance, downstairs motion on, upstairs off.
- Smart locks that lock automatically when the system is armed.
- Lights that open if motion is detected at night in specific areas.
- Voice assistants that allow you to arm the system by reciting a spoken PIN.
- Disarming by voice without a PIN.
- Automations that flip modes often based on presence detection that is only partly accurate.
- 1 hub or base station.
- 1 keypad or main control device.
- 2-4 door/window contact sensors for key external doors.
- 1-3 motion sensors for hallways and main living areas.
- 1 indoor siren (if the hub does not include one).
- 1 outdoor siren (where allowed).
- 1-2 cameras at key entry points or main internal choke points.
- Keep it at the center, not buried in a metal cabinet or behind appliances.
- Stay away from viewable entry points.
- Use an Ethernet cable instead of WI-FI if you want stable connectivity.
- Dry-fit the sensor and magnet first with temporary tape.
- Check alignment and test opening/closing in the app.
- Only then mount them permanently with screws or strong adhesive.
- Place them around 2–2.2 meters high.
- Position them in corners looking across the room rather than straight into windows.
- Avoid pointing them at radiators, HVAC vents, or spots where strong direct sunlight comes in.
- Define Away mode to arm all exterior doors, windows, and indoor motion.
- Define Home mode to arm only doors and windows.
- Define Night mode to arm doors, windows, and selected downstairs motion.
- Create unique codes or logins for each member.
- Avoid sharing a single “family” code if you want any audit trail.
- For cleaners, pet sitters, or contractors, use temporary or restricted access.
- High‑urgency alerts (calls, SMS if available) should be reserved for real alarms only.
- Utilize push notifications for significant but nonurgent events (e.g., system being armed/disarmed).
- Do not enable alerts for every single door that opens unless you have a clear reason for it.
- Set the system in Away mode.
- Wait for the exit delay time.
- Enter through a main door and walk your usual path.
- Check that the correct sensors trigger, the siren sounds, and alerts are sent.
- Perform similar tests for Home and Night modes.
- Forgetting to install firmware or application updates can result in open security holes and software bugs.
- Disregarding low-battery alerts causes you to have “dead” sensors that are, in fact, not functioning.
- Enable automatic updates and other similar features.
- Once a month, quickly check the app for device status and warnings.
- Keep spare batteries for your most critical sensors and replace them in batches every 18–24 months.
- Focusing the camera at a public sidewalk or shared hallways.
- Accidentally capturing neighbors’ gardens or windows.
- Old tenants or roommates.
- Ex-partners.
- Contractors or cleaners who no longer work for you.
- Who first checks the app to verify that it looks like a real incident?
- Who calls the local emergency services, if that is how it should be in your area?
- Where the household members should meet if they have to leave the house?
- Day 1–2: Map your home and risks. Draw your house plan with doors, windows, and weak spots. State whether you will only monitor burglary or want fire and leaking water too.
- Day 3: Choose your system type. Choose among the options of DIY, hybrid, or fully managed as per your comfort level, budget, and house type.
- Day 4: Define a lean starter kit. List your hub, siren, 2–4 contact sensors, 1–3 motion sensors, and keypad. Only add extras which clearly address a specific risk.
- Day 5: Plan placement. On the floor plan, mark and specify exact locations for the hub, sensors, and cameras. Verify Wi-Fi coverage and check for power outlets where applicable.
- Day 6: Install and configure. Mount the hardware, then set the modes, entry/exit delays, users, and notifications. Initially, keep automations simple.
- Day 7: Test and adjust. Go through Home, Away, and Night scenarios, including deliberately “intruder” tests and make adjustments based on your observations.
Why this fact is so important: The chimney is not the place most intruders use, but they opt for the route that is no one can see it easily.
The basic protection plan which can be made out of that map includes:
You are not just buying a “starter kit” to slap together; you are designing your security system in a more conscious way.
### Step 2: Identify the protection priorities
Your plan should be a reflection of what is most important to you and not just the items listed on the product box.
Be honest and face the music with the following questions:
#### Example: City apartment in Europe
For a regular flat with two middle floors:
– Give priority to the front door and the two balcony doors.
– A motion sensor in the hallway
– Alerts via mobile (no outdoor sound), to keep the relationship with the neighbors manageable.
#### Example: Detached house in the US
For a free-standing house with a garden:
– Ensure all the ground-floor doors and main windows are covered.
– Use outdoor cameras and yard sign for deterrence.
– Accompany it with a loud siren and the lighting scene which gets triggered when an alarm goes off.
The hardware that you choose would depend on the answers you provide, some will be necessary while others will be considered just “nice if the budget allows”.
### Step 3: Enlist system style to your home and activities
Primarily, you are going to encounter three sorts of systems. The choice of the right one is an integral part of your general blueprint, it is not an afterthought.
#### DIY smart systems
These are unit-based systems that include wireless sensors that you need to install yourself.
#### Hybrid: smart system plus professional monitoring
You set up a modern smart system but pay a monitoring center to respond to alarms.
#### Fully managed, professionally installed systems
A specialist designs, installs, and maintains everything.
A simple rule of thumb: if you enjoy tinkering with smart devices and know your router password off the top of your head, then DIY or hybrid is realistic. On the other hand, if you rarely touch your Wi-Fi settings, having some professional involvement is a wise step.
—
## 3. What Actually Improves Security (And What’s Just Nice to Have)
Though there are a lot of buttons and switches that might look beautiful but hardly help in practice, this part of the blueprint is aimed at telling you which ones are actually effective.
### Redundancy: power and connectivity
Redundancy entails the continued operation of the system upon the failure of something. This is the “resilience layer” of your design.
In locations with unstable power or Internet, this is not a luxury it is a must. If outages are rare where you live, then insisting on a battery backed hub is the least that you should do.
A simple thumb rule: if you’d be upset about the power going down during a storm, then your alarm shouldn’t go off with it.
### Entry and exit delays that fit your life
Entry delay refers to the length of time you have to disarm after opening a door. Exit delay is how long you have to leave after the exit arm is armed.
When these are too short, you will be constantly triggering the alarm; but if they are too long, an intruder may take too much time to navigate the area before the alarm is triggered.
A useful starting place is to set entry and exit delay long enough to be effective but not so long that you’ll find yourself rushing or waiting.
This is straightforward: no one should go running to the keypad in socks.
### The zoning and modes you actually use
A minimum of three modes is what most state-of-the-art systems can handle:
The decision-making question here is: **Which areas do you want to be armed when you are at a home, away, or sleep?**
Not using Home or Night modes at all means that your zoning does not resemble your movement in the house. It is much better to spend an evening doing so rather than feeling awkward having just the “all or nothing” mode.
### Smart integrations (to be used wisely)
The power of smart integrations is not to be questioned; however, your system can be turned into an unstable Rube Goldberg machine with their help.
Focused, useful integrations can be:
Risky or too-clever ideas are:
An ideal strategy is to begin with a couple of simple automations, run them for a month, observe the results, and then add more. If an automation fails in a way that makes you uncomfortable, remove it from the blueprint.
—
## 4. Step-by-Step: Setting Up a Smart Home Security Alarm System
Whether you stay in a compact flat or a bigger house, this is an exact workflow that you can follow for nearly any modern smart alarm system. This is the **execution layer** of the blueprint.
### Step 1: Select Your Core Kit
You should start with a low-level configuration rather than a mega bundle.
Optional but valuable additions include:
The most common error in this step is buying a massive kit “because it was a sale” and not being able to use half of the sensors. Another frequent mistake is combining too many brands and getting a plethora of apps without a single overview.
### Step 2: Place Your Hub and Sensors Smartly
Placement is the common issue most DIY installs go unnoticed. Good placement is the blueprint’s unrepairable thing.
For your **hub**:
For **door/window sensors**:
For **motion sensors**:
#### Example: Hypothetical two-bedroom apartment
Picture a common two-bedroom apartment:
– Contacts on the main and balcony doors.
– One motion sensor in the entryway that observes the living and bedroom doors.
– Hub in the living room, close to the router but hidden from the front door.
This handy plan can give you excellent coverage with fewer devices.
### Step 3: Configure Modes, Users, and Notifications
After the hardware is set up, the software installation is what makes the system accommodating or annoying. This is where many blueprints fall apart in real life.
For **modes**:
For **users**:
For **notifications**:
Being overwhelmed with notifications makes you ignore all notifications including the important ones.
### Step 4: Test like an intruder (safely)
An untested system is just a fancy piece of equipment.
Here is a simple test routine:
If any part of this comes out completely different from what you expect, try changing the delays, sensor placement or mode rules. It is better to find something unexpected while testing instead of catching it in the act at a real incident.
—
## 5. Common Mistakes That Make Good Systems Useless
Even when you purchase the best security hardware, you could still find yourself with weak protection if you fall into some predictable traps. This should be considered as the **”blacklist”** or **”do not include in the blueprint”** list.
### Neglecting updates and maintenance
The new components of a smart system are as dependent on software as they are on hardware.
A very easy routine:
### Poor camera placement and privacy issues
Cameras can be helpful, yet they are tangled with legal and moral issues, especially in some European countries and parts of the US.
Common problems consist of:
Cameras should mainly be directed towards your own door, driveway and garden aka. outdoor areas. If there is any hesitation, direct them slightly down and inward. In a multi-unit building, you have to extra careful and avoid capturing shared spaces where the rules might be stricter.
### Casual sharing of access
Over time, many people find themselves with a long list of people who once had access and indeed never lost it.
Check every few months who has codes or app access and remove people who don’t need it anymore. If possible use individual accounts or codes so you can revoke them cleanly without affecting others.
### Never practicing what happens during an alarm
The sound of an alarm going off is upsetting. If the people in the house have no idea of what to do, then time is wasted.
An easy “alarm drill” could be:
Carrying out this exercise once or twice a year makes it a real event much less chaotic.
—
## 6. Putting It All Together: Your 7-Day Smart Security Blueprint
You don’t have to be a security engineer. You only need a system that fits your lifestyle and you will actually use every day.
To make this practical, here is how to convert everything above into an easy 7-day blueprint.
### A 7-day action plan you can actually follow
By treating the smart home security alarm system like a living ecosystem that you are adapting and changing/ reconfiguring for the first few weeks rather than a one time fix you will achieve the goal you wanted in the first place: practical proof of your protection that is well tested and far fewer 3 a.m. old costume alerts.